Transhuman4Blender || Wig ||
The Wig panel has options that control the color and style of your Transhuman's hair. These options, along with other customizations, can all be saved in the presets, allowing you to load your saved Transhuman presets with their own custom Wig.
Please note that, for now, the plugin doesn't save the grooming edits you make, only the hair style (color, curls, waves, frizz, etc...)
Color Options
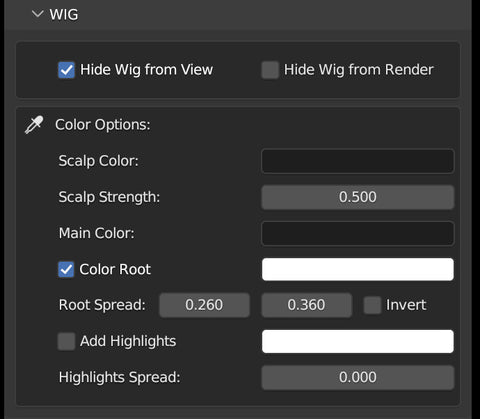
The first two toggles allow you to hide the Wig in the Viewport and/or in the Render.
Next, we have the color options. You can specify the Color of the Scalp and the Strength (opacity, thickness of the shaved hair). This option is great for hiding bald spots that might show through the hair by darkening the scalp to match the desired hair color. The maximum value of the slider is 1, but you can add higher numbers if you need a greater coverage.
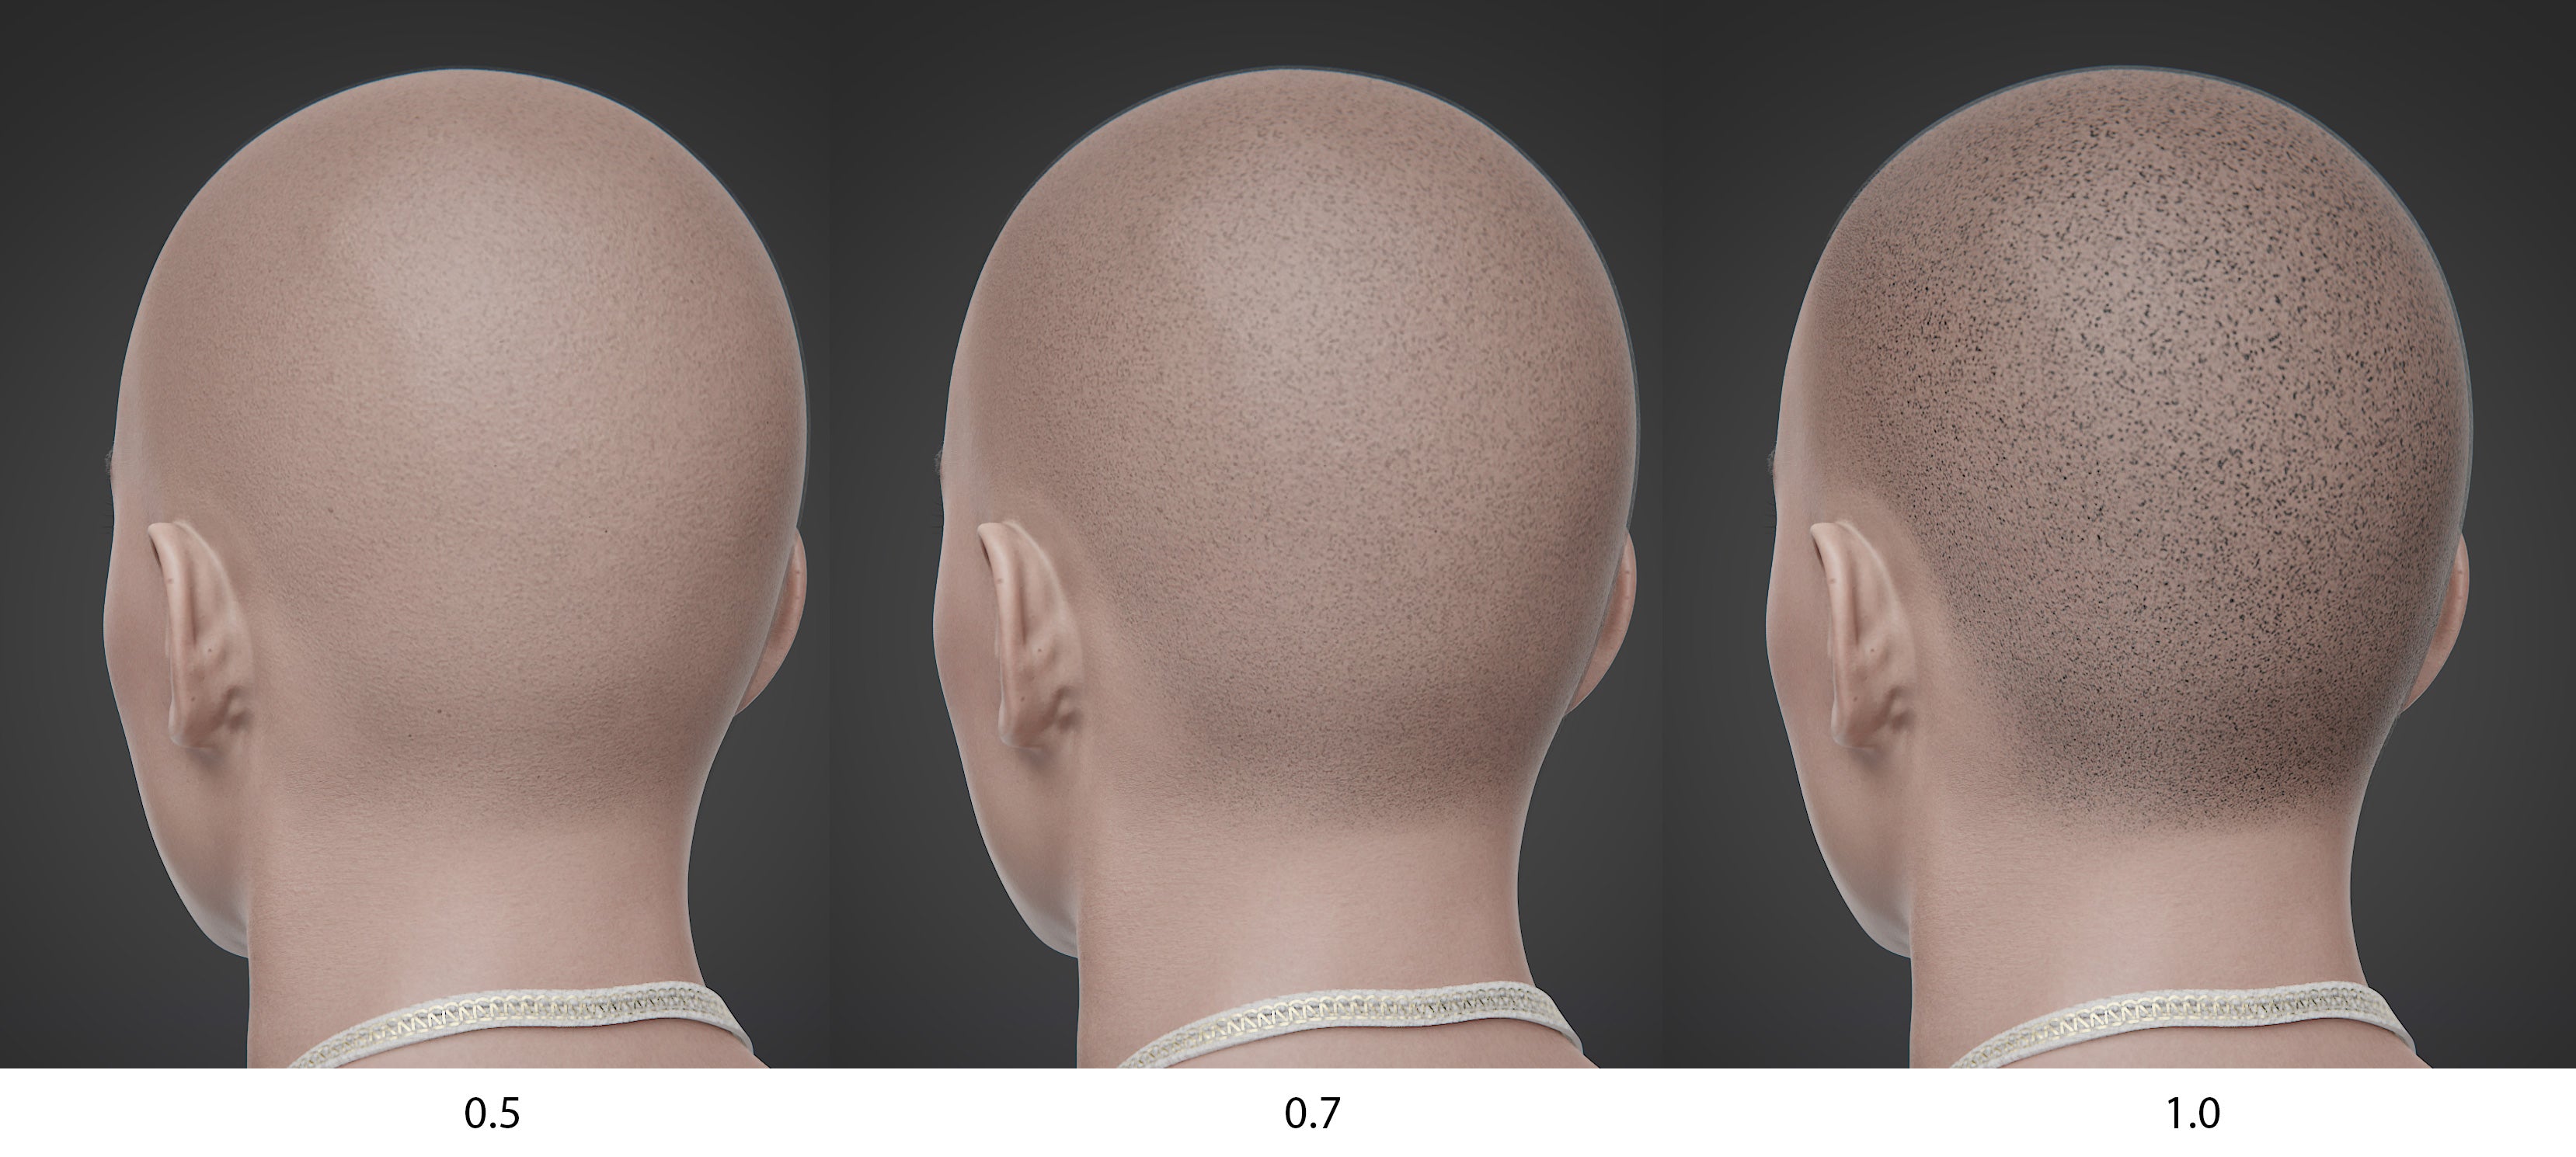
Main Color is the dominant color of your Transhuman's hair.

The Root Color toggle activates the color of the roots, which you can then edit. With Root Spread you can spread the color of the root and make it sharp or smooth using the sliders. Invert will switch the coloring from the Root to the Tips.

Add Highlights enables a secondary color to the hair. It's very useful to add grey hairs or color variation. You can control the amount of highlights with the Highlight Spread slider.

If you wish to make a new hair, please use the included "SM5 Transhuman Hair" as the base, the "SM5 Hair Particle Material", and the "SM5 Hair" geometry nodes for this panel to work 👌
Hair Appearance (Basic)
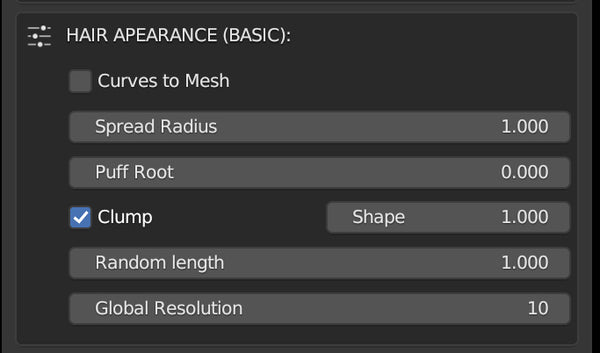
The Hair Appearance (Basic) section holds the settings that are common for both Mesh and Curves hair.
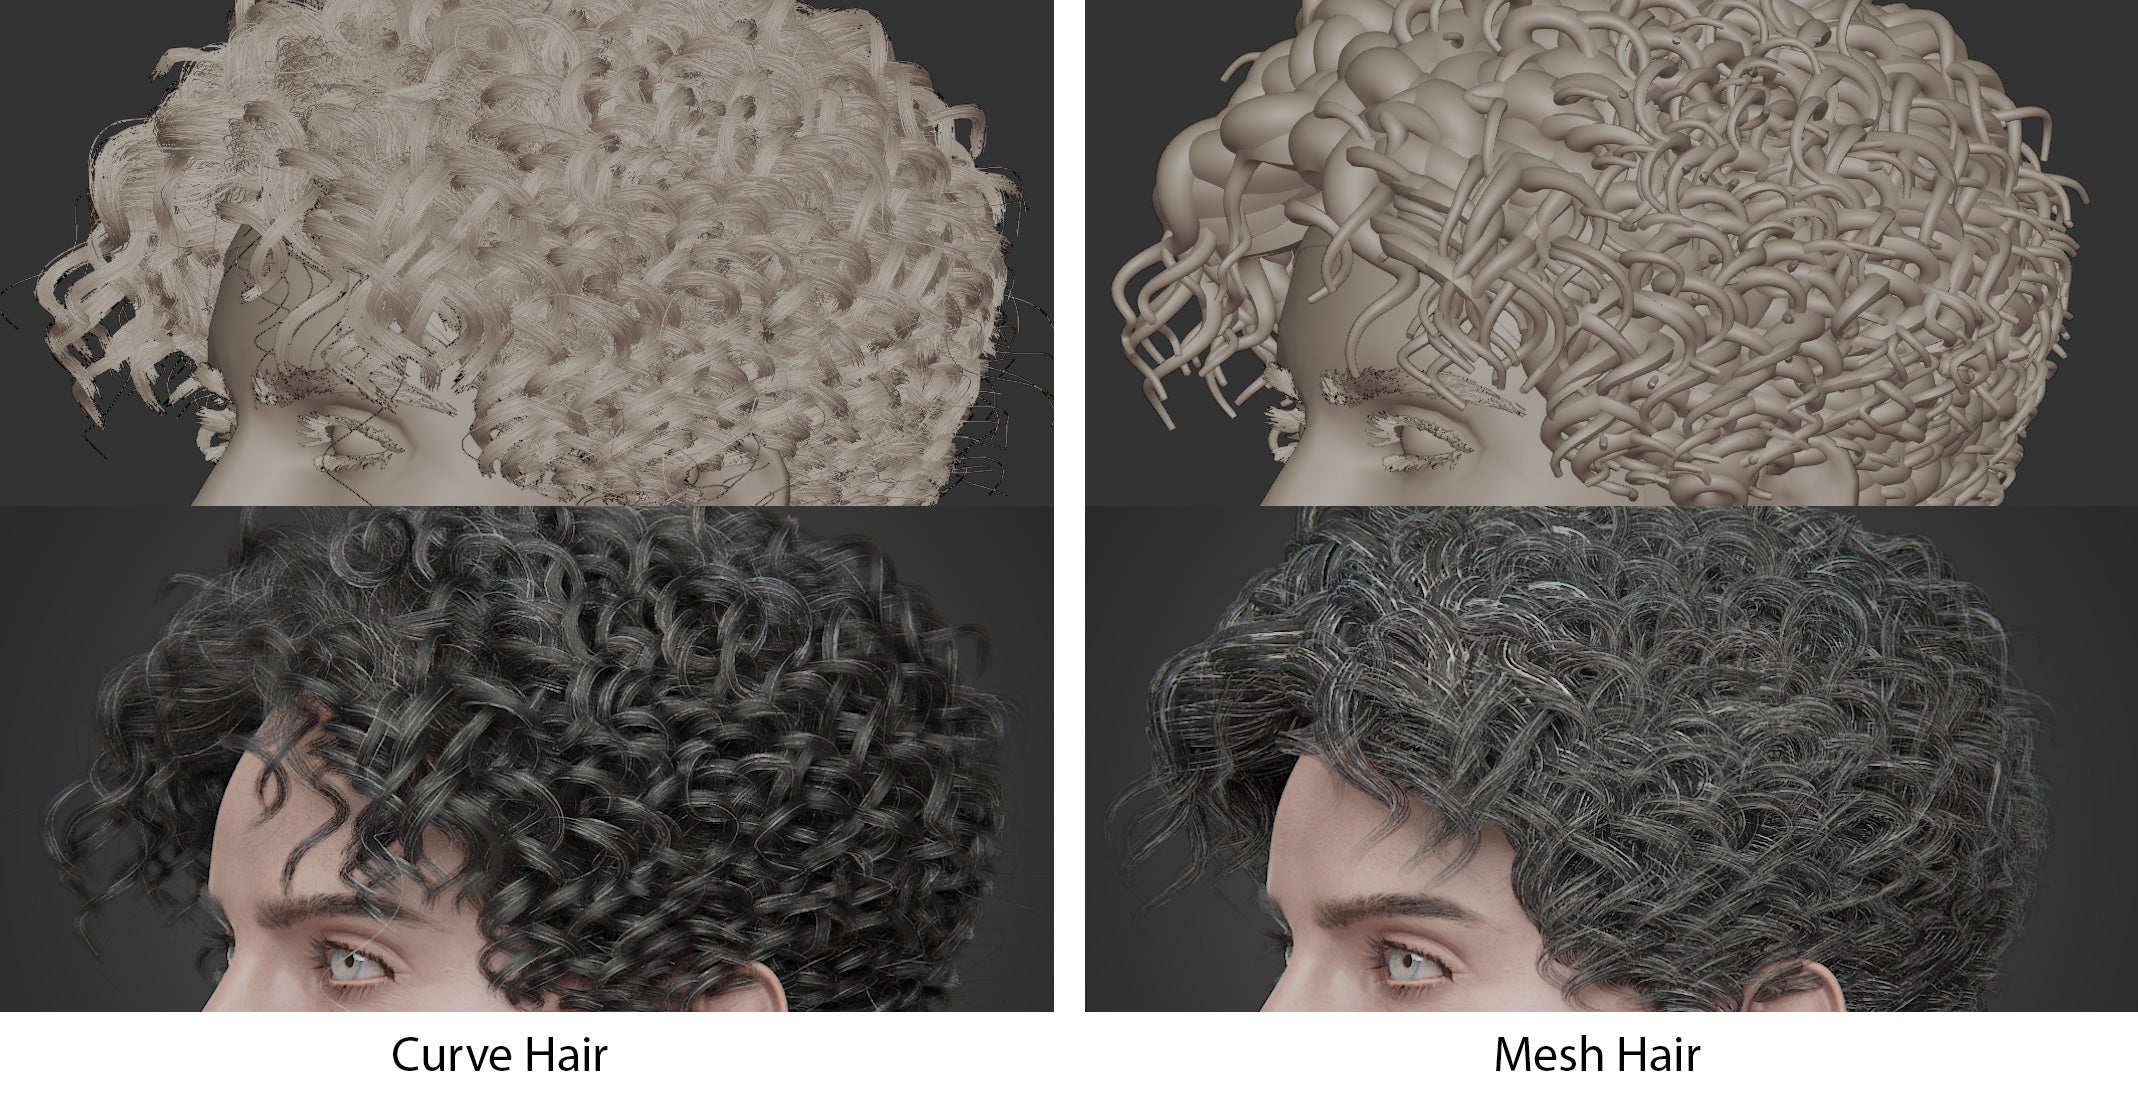
The first toggle allows you to automatically turn your hair into Mesh, maintaining the same shape and color customizations, and an overall identical appearance. This option is great from those who whish to export custom Transhumans to other platforms.
✨ Even with Curves to Mesh toggled, you can continue to edit and groom the hair, as if it was regular hair curves!
The Spread Radius is the distance in which the Children hairs will grow around the Parent (for Curves Hair), and in the case of the mesh tubes, the diameter.
Puff Root elevates the hair near the roots upwards. Useful for when the hair is so close to the scalp that creates bald spots and artifacts.
Clump makes all the Children hairs gather at the tip. Shape affects the strength of the effect, being 0 'no clump' and 1 'full clump'.
Random Length makes the length of the hair strands uneven, perfect to add realism and break the shape.
Global Resolution sets the resolution of the Parent hair curves. This settings overrides the Curl Resolution, so you might want to make it higher at first, and lower the value once the hairstyle is decided.
Curls & Waves
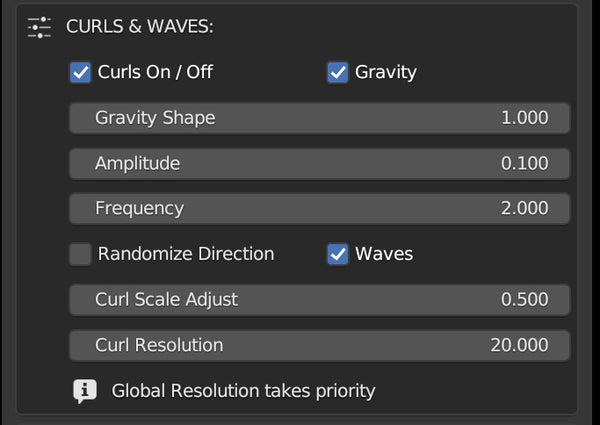
The first toggle activates the Curls & Waves option.
Gravity softens the curling of the hair near the roots. It's a way of adding transition from straight to curly.
Amplitude makes the curls' diameter bigger or smaller.
Frequency makes the curls closer together by adding new curl loops.
Randomize Direction breaks the evenness and makes the curls face random directions.
Waves makes the curls flat.

Curls Scale Adjust makes the overall curl effect bigger or smaller. A number of 0 returns the hair to straight. You can use number above 1 to make the curls larger easily.
Curl Resolution makes the Parent curves increase the number of points. Use it when the curls look jagged or undefined, to soften them. Global Resolution takes priority. If the curls look bad even with high resolution, increase the Global Resolution in the section above.
Loose Hairs
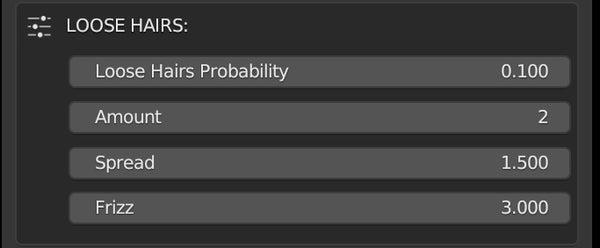
Loose Hair Probability increases the number of loose hairs that spike out of the mass. Amount multiplies the loose hairs for the desired number. Spread makes the loose hairs stick out more or less. Frizz makes the loose hairs' surface noisy.
Advanced Options (Curves)
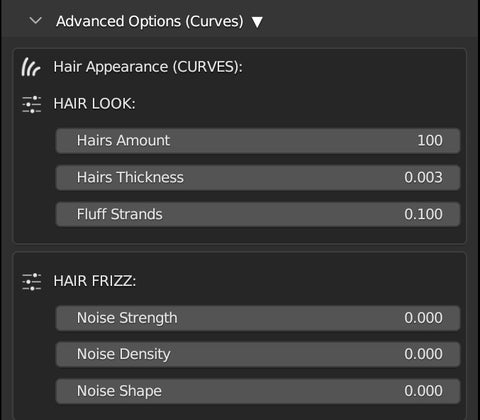
The options in this panel deal with the final look of the curves hair. In this panel you can specify the Hair Amount that will be displayed and rendered, the Thickness of the rendered hairs (not visible in the viewport, must render preview to check), and Fluff the strands.
The Hair Frizz option helps you add noise to the hair structure to make it uneven and frizzy.
Advanced Options (Mesh)
This panel holds all the options to finetune and optimize your Transhuman's mesh hair.
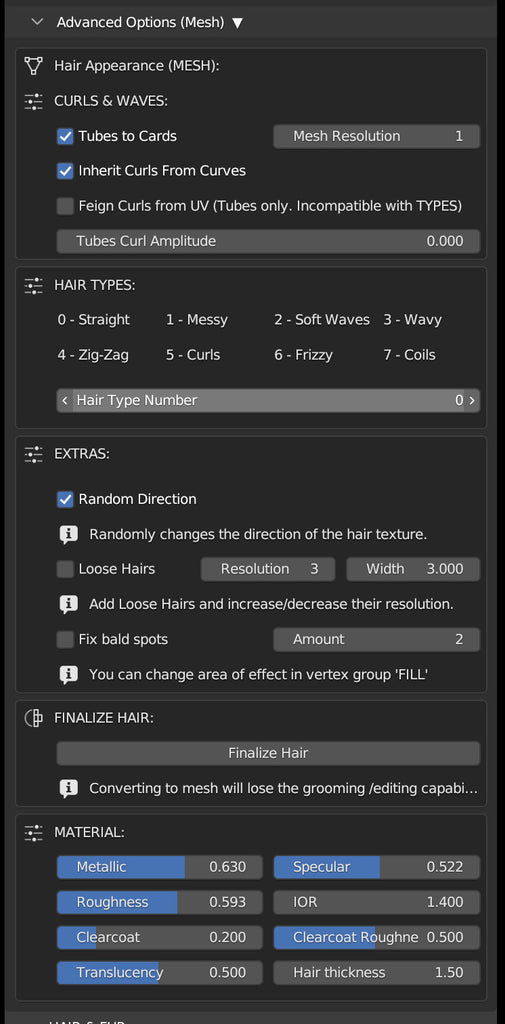
👉 Please note: None of this options will work unless the Curves to Mesh toggle is active at the top of the wig panel.
If you activate the Statistics option in the Overlays panel (Blender) you can see the number of polys that your visible scene elements have.
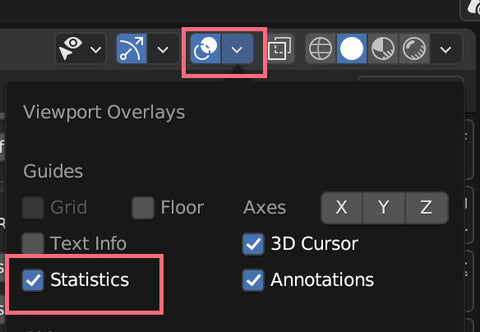
Without hair and clothes, a low-res Transhuman has around 9k faces / vertices (18k triangles). The number quickly increases once we add the eyes, the nails, the teeth, etc...
The mesh hair can also add a lot of polys to the finished Transhuman, so it's good practice to check this number and try to optimize the hair. A number of polys below 100k is good, but the lower you can go, the better performance you'll get.
The first two options will do just that. Tubes to Cards replaces the mesh tubes for flat cards, reducing dramatically the number of polys by half. It will still look great, almost identical! The counter side is that there might appear bald spots here and there (those can be fixed later).

Mesh Resolution adds a subsurface subdivision to the hair mesh, making it smooth but also increasing the number of polys. A level of 0 to 1 is best for exports.

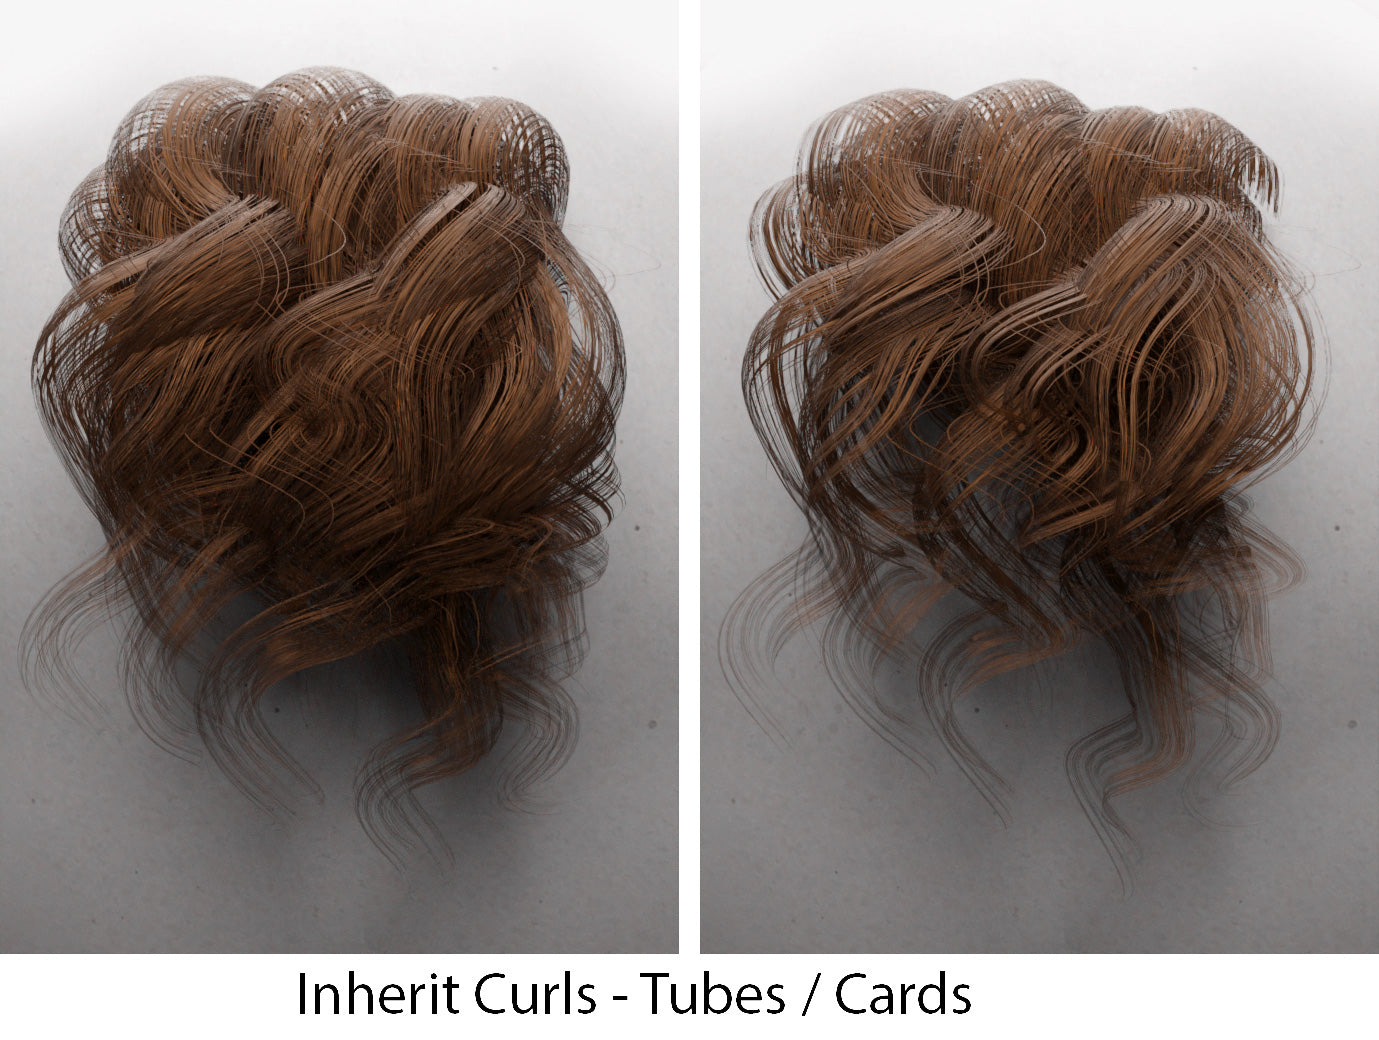
Inherit Curls from Curves makes the mesh hair follow the same curvature as the Parent curve hair guides. This offers an amazing result, but it will increase the poly count.
Feign Curls from UV is a much cheaper option (poly-count wise), since it simulates the curls by twisting the UV textures instead of the actual geometry. This option is only compatible with tubes (not cards), and it cannot utilize the Hair Types, as explained below.
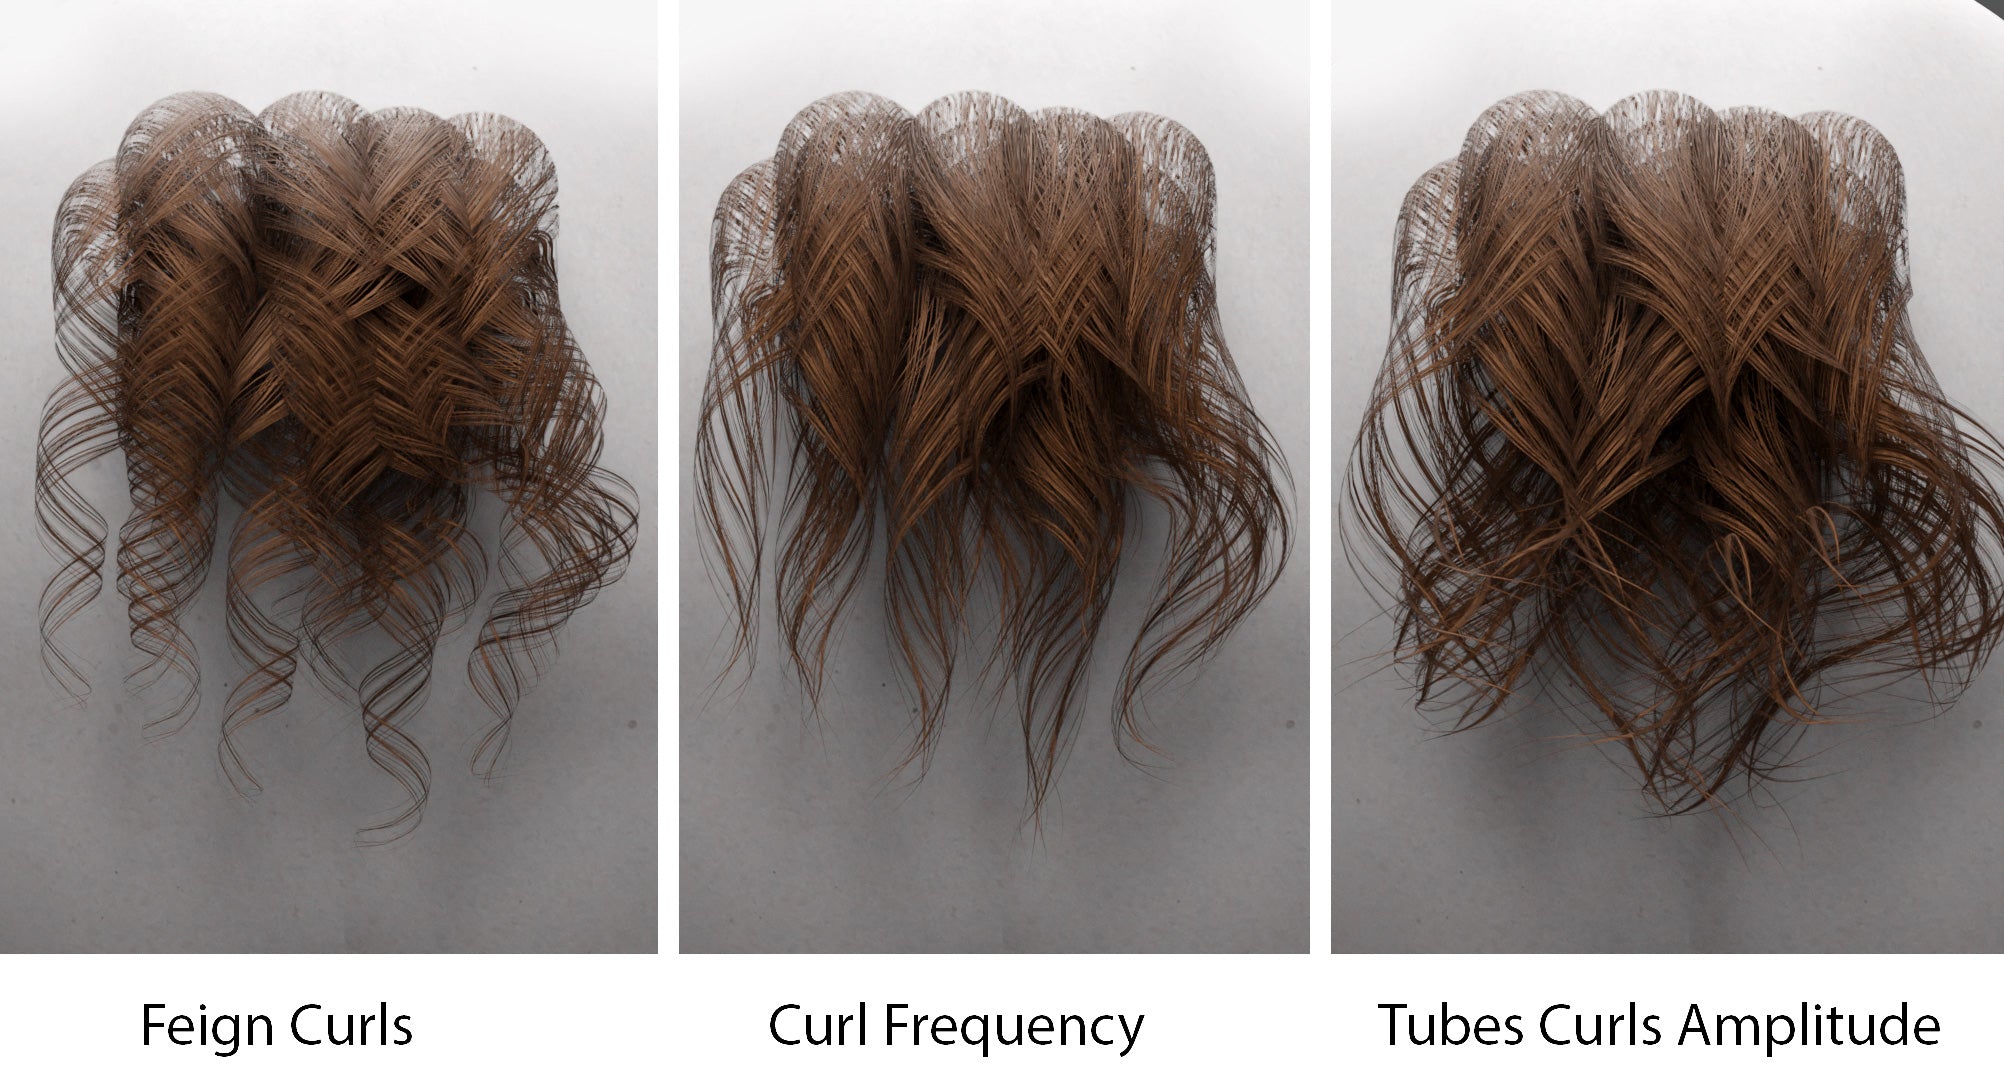
Tubes Curl Amplitude makes the tips of the mesh tubes larger, just like the Amplitude option does in the global CURLS & WAVES section above. The Curl Frequency is linked to the setting in the global panel, as it's intended to mimic the same aesthetic as the original curves hair.
Hair Types
There are eight types of hair available for the Mesh Hair (cards or tubes), and they can be selected in the Hair Type Number. The hair has a slightly different appearance in card and in tubes, as seen in the following sample.
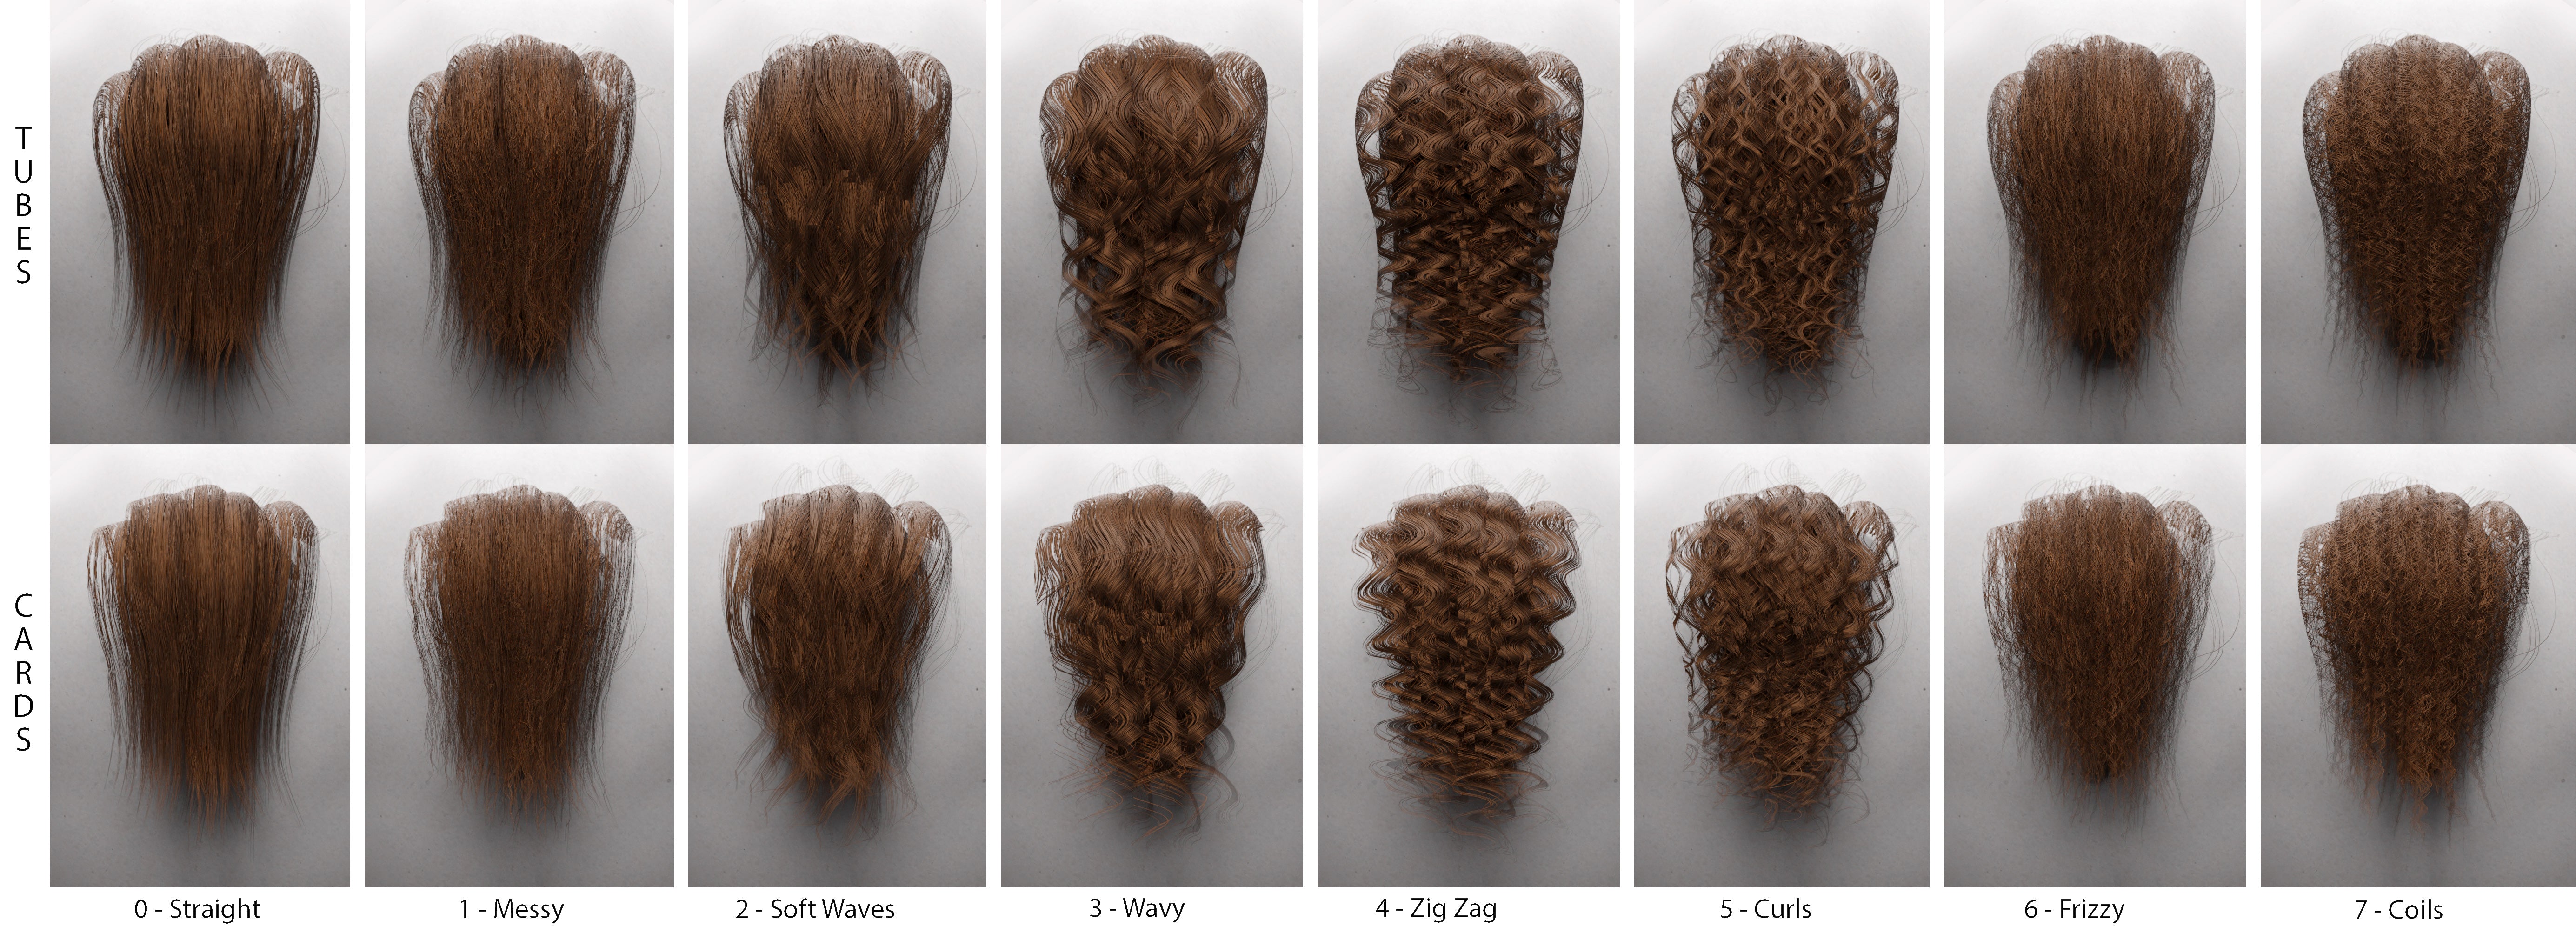
This option gives you even more flexibility when you are using mesh hair, since the same hair style can become entirely different by just changing the type.
Extras
Random Direction randomly changes the direction of the texture to break the evenness.
 Loose Hairs adds an extra layer of mesh cards that will simulate loose hairs to incorporate extra realism (and extra polys to the final count). Resolution makes the loose hair cards smoother, and Width makes them wider.
Fix Bald Spots inserts new hair guides in the selected area (the default is the head's center-top), and Amount specifies the proportion of the addition. To edit the area of influence, edit the vertex group 'Fill' from SM5 Scalp Transhuman.
Finalize Hair
If you wish to export the hair, you must first convert it to mesh. Finalize Hair removes the original curves-based hair and turns the Wig to geometry. Remember that by doing so, all the editing and grooming capabilities will be lost.
Material
The sliders in this section allows you to easily modify the mesh hair material from the panel without having to visit the Shader Editor 👍

